Braided Pesto Bread

Perfect with a glass of sauvignon blanc!

Ingredients:

  • 1/2 cup warm water
  • 1 package active-dry yeast
  • 1/2 tablespoon sugar
  • 1/2 cup milk
  • 2 cups bread flour, plus more for dusting
  • 1 tablespoonkosher salt
  • 1/4 cup olive oil
  • 1 large egg
  • 1 teaspoon water
  • 1/2 cup pesto sauce

Directions:

  1. Combine the water, yeast, and sugar until blended. Let stand in the bowl for about 5 minutes until the mixture appears foamy.

  2. Add the milk (at room temperature), olive oil, and salt to the yeast and mix until just combined. Add the flour, 1 cup at a time, mix after each addition until combined into a homogeneous mass.
  3. Scrape the raggedy dough from the edge of the mixer bowl. Knead for 5 to 8 minutes. The dough will be less sticky and become smooth on the surface. It will clear the sides of the bowl.
  4. Cover dough with a large kitchen towel and set aside in a warm spot in the kitchen. Allow to rise for 1 hour until it has almost doubled in size. The dough should be smooth and puffy-looking.
  5. Preheat the oven to 200°C and prepare egg wash by whisking the egg and water in small bowl and set aside.
  6. When the dough has risen, lightly flour a work surface. Turn the dough out onto it and divide it into 3 equal pieces.
  7. Lightly flour a rolling pin. Roll one piece of dough into a rough 8-inch square. It should be about 1/8 inch in thickness.
  8. Spread pesto on the dough, leave a 1/2-inch border uncovered. Use a pastry brush to brush a small amount of the egg wash over the exposed edge.
  9. Lift up the pesto-covered edge and roll it up, as tightly as possible. Pinch the seam closed with your fingertips. Gently roll the tube back and forth until it spreads lengthwise to about 10 inches long.
  10. Line up 3 rolled tubes on a sheet of parchment, positioning the thin ends toward you. With a very sharp, long knife, make a lengthwise slash through each, cutting a deep slit halfway down the depth of the tube; make sure not to cut all the way through to the bottom.
  11. Braid the tubes together, crossing one of the outer tubes gently over the middle one. Then cross the other outer tube up and over the new middle one. Repeat, working your way down to the end. Half of the tube should be braided. Then turn the parchment paper around and braid the other side, from the center point to the end, so that the entire loaf is braided. Tuck under ends if desired.
  12. Let the bread rise for another 30 minutes before baking.
  13. When the loaves have risen, uncover and brush well with the egg wash.
  14. Bake for 10 minutes. Reduce the oven temperature to 160°C.  Bake for an additional 30 to 35 minutes, turn the pan 180° from its original position every 15min to ensure even baking, bake until the bread is brown and crusty.


Ferrero Rocher Cookie

Happy year of the dog everybody!

Chinese New Year is the time when you visit your friends and relatives, very often those you only see during this time of the year, and got “interrogated” by them =.=.  Gift plays an important role in Chinese culture, so you never go empty-handed! If you pay attention to TV commercials enough, you may notice that many of the most popular gift items among Hong Kongers are, interestingly, not Chinese produces. Kjeldsens Cookies, Almond Roca, Sugus, Ferrero Rocher… just to name a few. Ferrero Rocher is particularly popular in Hong Kong for its golden package, a color Chinese people love for it symbolizes wealth.  I’m not a superstitious person, but I do like their creamy, nutella-like centres!

And…. Surprise, surprise! They are equally nice when made into cookies!!


Ingredients (yield 12 pieces):

  • 6 Ferrero Rochers  (freeze them before baking)
  • 1 cup (packed) all-purpose flour
  • 1 tsp cornstarch
  • 1 tsp baking soda
  • ½ tsp salt
  • ¼ cup butter (1 stick), softened
  • ¼ cup white sugar
  • ¼  cup brown sugar
  • 1 large egg
  • 1 tsp vanilla extract

Directions:

  1. Place the Ferrero Rochers in the freezer until firm, about an hour. Remove from freezer and hit with a hammer in a zip-loc bag a few times until they’re broken into chunky pieces. Put back in the freezer until ready to use.
  2. Preheat oven to 180°C. Line two baking sheets with parchment paper; set aside.
  3. In a small bowl, mix together the flour, cornstarch, baking soda, and salt; set aside.
  4. In a large mixing bowl, cream the butter, white sugar, and brown sugar until fluffy. Beat in the full egg, then the vanilla, mixing until smooth. Add flour mixture in three parts, stirring until just combined after each addition.
  5. Stir in ½ the Ferrero Rocher pieces. Drop tablespoon-sized balls of dough onto prepared baking sheets, spaced 2 inches apart. Place the remaining Ferrero Rocher into the tops of the cookies, pressing them into the dough slightly.
  6. Bake for around 10 minutes until edges are nicely browned. Let cool on baking sheet for 5 minutes, then transfer to wire rack to cool completely.

Fluffiest Overnight French Toast

As the year ends, it’s the perfect time to reflect on what you have accomplished and look ahead to your new goals.

Cooking, hoarding recipes, photographing food and, of course, eating, have been my lifelong passions. Two years ago, I started the page << Miss Amateur Chef >>, this has changed my life and taken my obsession with food to a whole new level. The kitchen has always been my place of solace; working in the kitchen, testing recipes bring not only joy but beautiful memories. This little project of mine allowed me to properly document my favorite recipes- which I believe can now live on forever =)

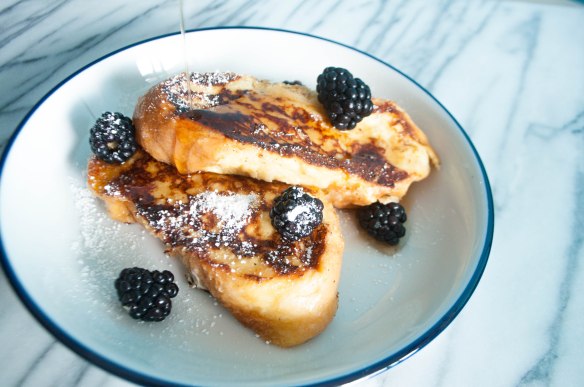
Let’s start the new year with a scrumptious breakfast! This French toast is a real crowd pleaser, it comes out best when you work with thick slices of loaf bread and allow them to soak in the mixture overnight. “Preparation is the key to success”- this applies to cooking and everything else in life. May all our preparation in 2017 make us FIERCE and UNSTOPPABLE in 2018!!!

DSC_0798


Ingredients:

Directions:

  1. Beat together egg, milk, salt, cinnamon and vanilla.
  2. Soak slices of bread in mixture overnight, until saturated.
  3. Heat a lightly oiled skillet over medium-high heat, cook bread slices on both sides until golden.
  4. Serve hot with maple syrup and berries.


Ochazuke with Seared Oysters 

Summer is almost at an end. Almost, but not quite yet. With the daytime temperature still reaching over 30 degrees, I have been craving for a dish that is light yet comforting…

That’s when Ochazuke (お茶漬け) comes in handy: a simple rice dish which combines green tea (ocha), steamed rice, and an assortment of savory ingredients (zuke means “submerged”). In Japanese homes, ochazuke is often regarded as a comfort food. It is typically enjoyed as a filler snack, any time of the day, but it is especially loved as a midnight snack (or as a hangover remedy)!

Try this really simple recipe and enjoy a hearty snack like your favorite manga character!

(You can use cold rice and cold dashi or tea in summer time to enjoy a more refreshing version of Ochazuke.)


Ingredients:

Ochazuke:

  • 1 cup cooked, steamed Japanese rice
  • 1/2 to 2/3 cup hot brewed Japanese tea (I swear by the Gyokuro stems teabag from Nakamura Tokichi Honten!) , just enough to cover the rice
  • 1/2 tbsp of soya sauce (optional)
  • Pinch of white sesame seeds (toasted)
  • Pinch of shredded seaweed

Seared Oysters:

  • 3-4 oysters
  • 1/4 cup mirin
  • 1/4 cup light brown sugar
  • 1/4 cup soy sauce

Directions:

  1. Set frying pan to medium-high heat.
  2. Pat oysters dry. Add to the pan and cook for a 1-2 minutes on each side until nicely brown.
  3. Remove oysters and reduce the heat to medium. Mix mirin, brown sugar and soy sauce, add to the pan.
  4. If sauce is nicely reduced and thickened, turn off heat. If not, continue to cook over medium heat until desired consistency is reached.
  5. Add in oysters and stir-fry for 1 minute, or until they are well-coated with the sauce.
  6. Pour the tea until it covers half of the rice and top with oysters. Add soy sauce if you like.
  7. Sprinkle sesame seeds and shredded seaweed on top for extra flavor.


Lu Rou Fan- Taiwanese Braised Pork Rice

Lu Rou Fan滷肉飯 (Taiwanese Braised Pork Rice)

Caution: The following recipe is not for the faint of heart!!

Okay, just think of it as Chinese Bolognese meat sauce! Although pork belly is the cut where bacon originates, and is known to be heavy in fat, you’ll find that the Lu Ro, despite flaunting thick layers of fat, is surprisingly not as greasy as you might have imagined. In fact, since the pork is cooked under low heat for an extended amount of time, the amount of fat is somewhat mitigated.

Braising has always been one of my favorite ways to cook meat; it is the best sort of kitchen alchemy- transforming tough cuts of meat into something completely flavorful and tender, and you know what… braised meat tastes even better the next day!


Ingredients:

  • 1 lb skin-on pork belly, cut into 1/2” pieces
  • 2 teaspoons oil
  • 1 piece of medium size rock sugar
  • a couple of shallots, finely chopped
  • 4 dried shiitake mushrooms, cut into 1/2” pieces
  • 1/4 cup rice wine
  • 1/2 cup light soy sauce
  • 1/2 cup dark soy sauce
  • 1 cups water
  • 2 hardboiled eggs, peeled (optional)

For the spices (wrap everything in the spice packet):

  • 3 star anise
  • 1 cinnamon stick
  • cumin seeds
  • 3 bay leaves
  • 2 teaspoons Sichuan peppercorns
  • 2 slices fresh ginger

Directions:

  1. Preheat oven to 160 degree C.
  2. Heat the oil in a Dutch oven over low heat, add in the sugar. Add the minced shallots when the sugar starts to melt. Turn up the heat to medium high and stir-fry the shallots for a minute.
  3. Add the mushroom pieces and chopped pork belly; stir-fry for another 2-3 minutes.
  4. Pour in the blanched pork, rice wine, light soy sauce, dark soy sauce and water. Stir and bring the mixture to a boil. Once boiling, add the spices (which should be wrapped in cloth), along with the peeled hardboiled eggs.
  5. Transfer everything to the oven and cook for around 1½ hours.
  6. Once the meat is fall-apart tender, remove the spice packet. Transfer Dutch oven to the stove, cook under medium high heat to thicken the sauce, stir occasionally, for about 5-minutes. The sauce should be thick enough to coat a spoon. Serve over steamed white rice!


Taiwanese Beef Noodles made with Dutch oven

My go-to recipe for a hearty meal full of braised tender beef, vegetables and plenty of carbssss!

Sluuuurp~


Ingredients:

  • 2 pounds meaty beef short ribs
  • 2 onions
  • 2 tomatoes
  • 3 slices of peeled fresh ginger, smashed
  • 1 bunch scallions, white parts smashed with flat side of a large knife and green parts chopped
  • 1.5 cup Chinese rice wine
  • ¾ cup soy sauce
  • 1 fresh red chile
  • 3 tablespoons of Doubanjiang
  • 3 cups of water
  • 1 teaspoon of freshly grinded pepper
  • 2-3 cubes of rock sugar
  • 10 ounces dried Chinese wheat noodles
  • Bok Choy for garnishing

Directions:

  1. Preheat oven to 180 deg C.
  2. Cut onions and tomatoes into wedges, scallions into sections.
  3. Chop short ribs into 3-inch cubes.
  4. Heat the olive oil in a large Dutch oven. Add the onions, tomatoes, scallions and ginger slices and cook over medium heat for 10 minutes, stirring occasionally, until the onion is lightly browned.
  5. Dry the beef cubes with paper towels. Toss into the Dutch oven, sear the beef in the hot oil for 3 to 5 minutes, turning to brown on all sides.
  6. Add the soya sauce, water plus Chinese rice wine, just enough to almost cover the meat.
  7. Add the rock sugar, pepper and Doubanjiang , toss in red chili. Bring to a simmer.
  8. Cover the pot with a tight-fitting lid and place it in the oven for about 2.5 hours or until the meat and vegetables are very tender when pierced with a fork.
  9. Serve with noodles and bok choy!


A woman’s love affair with doughnuts

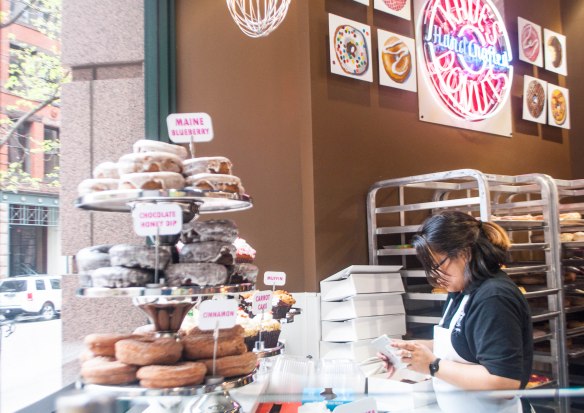
There is no doubt that Bostonians love doughnuts. After all, there’s a Dunkin’ Donuts on every other block. The city even has a doughnut named after it (Boston Creme, anyone?). I mean, who can blame them? There’s something special about that fluffy, sugary, fried dough. I am not from Boston, but I’m in no way above the temptation of fried dough goodness. When Krispy Kreme closed all its stores in Hong Kong overnight ten years ago, a part of me was taken away…  Since then I go on a doughnut hunt whenever I’m out of town, independent joints or big chains, I visit them piously, almost like pilgrims.

These local doughnut places in Boston have survived the turf wars with Dunkin’ Donuts, many supported for years by a fiercely loyal clientele… and it’s not hard to tell why!


Union Square Donuts

20 Bow St, Somerville, MA 02143

Brown Butter Hazelnut Crunch is a real show stealer

DSC_0019.jpgDSC_0025

Kane’s Donuts

90 Oliver St, Two International Pl, Boston, MA 02110

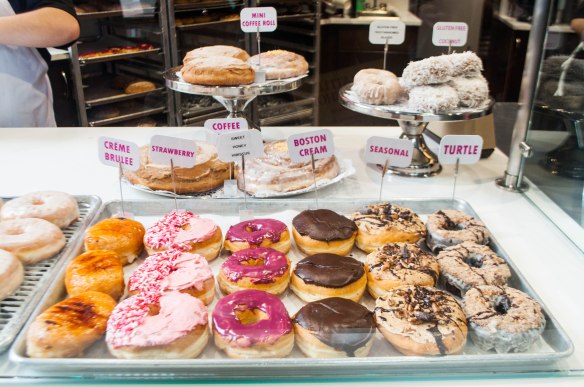
Great selection of fancy donuts. Go for glazed and creme brûlée if you’re committed to an ultimate sweet tooth experience.

DSC_0071

Twin Donuts

501 Cambridge St, Allston, MA 02134

Highlight is definitely the inviting neon sign!

Blackbird Doughnuts

South End, 492 Tremont St, Boston, MA 02116

We all need a confetti doughnut from time to time to celebrate life!

DSC_0942-2.jpg

Red Apple Farm

100 Hanover St, The Boston Public Market, Bostom, MA 02108

An apple a day keeps the doctor away…
So, why not eat your apple in donuts form?

DSC_0032.jpg

Flour Bakery

12 Farnsworth St, Boston, MA 02210

Not really a doughnut shop, but the bakery’s renowned sticky sticky bun, especially when fresh out of the oven, mimics the flavours of  a doughnut.


No-peel Apple Cream Cheese Tart

Ask anyone who knows me and they will tell you that I am a BIG sucker for apple tarts. Indeed, I like all sorts of apple desserts- apple turnover, tarte tartin, apple strudel, etc etc… As much as I like these aromatic pastries filled with the unmistakable scent of cinnamon, I seldom make them on my own because I hate peeling apples!!! So you can probably imagine my excitement when I stumbled upon this no-peel apple tart recipe. ♥

Happy baking everyone!


Pastry:

  • 250g plain flour, plus extra for dusting
  • 70g icing sugar
  • 125g unsalted butter, cubed
  • 1 egg yolk
  • Beans for baking

Filling:

  • 4 ounces cream cheese, at room temperature
  • 1/2 cup granulated white sugar
  • 2 large eggs, at room temperature
  • 2/3 cup cream
  • 1 teaspoon pure vanilla extract
  • 1 teaspoon grated lemon

Topping:

  • 3 apples (cut into 8 -12 slices each)
  • 4 tablespoon brown sugar
  • 2 tablespoon unsalted butter
  • 2 teaspoon cinnamon
  • 1 tablespoon lemon juice

Directions:

  1. Preheat oven to 160C fan.
  2. To make the pastry, mix the flour and icing sugar in a bowl. Rub the butter into the flour with your fingers until crumbly.
  3. Mix in the egg yolks, roll into a ball. If the pastry is still too dry, add 1-2 tbsp water until it comes together.
  4. Place the pastry in your tart pan and, using your fingertips; evenly press the pastry onto the bottom and up the sides of your pan. Gently pierce the bottom of the crust with the tines of a fork. (This will prevent the pastry crust from puffing up while it bakes.)
  5. When ready, place the tart pan on a larger baking pan and bake until the crust is golden brown, about 13 – 15 minutes. Remove from oven and place on a wire rack to cool while you make the filling.
  6. Beat cream cheese using a hand mixer until smooth. Add sugar gradually until incorporated. Add eggs (one at a time) until thoroughly combined.
  7. Add the remaining ingredients and beat until well blended and smooth.
  8. Carefully pour the filling into the pre-baked tart shell and then bake the tart for about 30 – 35 minutes or until the filling is set. Transfer tart to wire rack to cool and start making the topping.
  9. Melt the butter in a large skillet over medium heat. Add the apples to the pan and sprinkle with 2 tablespoon brown sugar. Sauté the apples, frequently stirring, for 6 to 8 minutes until they just begin to turn tender. (Be careful not to overcook at this stage as the apples may become puree!)
  10. Sprinkle the apples with the remaining sugar and add cinnamon. Toss the mixture gently and cook over medium heat for an additional 1-2 minutes until the sugar begins to caramelize, and the apples are crisp-tender.
  11. Arrange the apple slices in an overlapping spiral pattern. Pour the remaining caramel sauce on top of the apples.
  12. Chill in the refrigerator for 1 hour before serving!

Under the Tassie Sun

Happy year of the rooster everyone!

After the non-stop family gatherings and reunion meals over the past three days, my life seemed to go back to normal. I finally have time to sort out all the photos from my Tasmania trip. I feel a growling rumble in my stomach while going through the films, and it wasn’t because I haven’t had enough of turnips cakes, my all-time favourite…

Just like any other wanderluster, I have an constant yearning for new tastes and discoveries. “Under the Tassie Sun” summarized my adventure from the North to the South of Tasmania. Starting in Launceston, Tasmania’s second’s city that has forever been locked in rivalry with Hobart, but to me somehow has the zestier food scene, to the humble but charming seafood shack in Freycinet. Up long winding roads and down farm tracks, through blazing sun and misty rain, I visited producers and local shops that are fighting the big corporations and creating artisanal products to sell with pride. I fell in love with the delicious giant oysters and all the colourful dishes that radiated the true spirits of summer (and don’t get me started on the affordable but very flavoursome wine).

At the end of the trip, I returned home with my suitcase laden with all the edible souvenirs like jasmine infused honey, whisky marmalade, but most importantly a grateful heart to all the people who welcomed me into their farms and shops, shared with me their passion for food. I hope u like my photos and enjoy Tasmania as much as I did. Bon Voyage!

Fantastic sauces to sample that have been made on site using only fresh local ingredients. I’m amazed by all kinds of sauces they came up with, an excellent variety from sweet to savoury, with Whisky Seville Marmalade being my personal favourite.

You can buy their products in HK at Feather & Bone.

Tasmanian Gourmet Sauce Company: 174 Leighlands Rd, Evandale TAS 7212

Longford- a country town full of colonial charm.

Evandale’s Sunday market is one of the highlights of the trip. Unlike most food markets in the states or in Europe, where the selection is excellent, but resellers run most stands. In Evandale the producers (farmers) run the majority, you really get to interact with each and everyone of them and listen to all their stories about starting up a local business.

Breakfasts on the road usually means a cup of black coffee plus a flaky croissant at best. In Evandale’s Sunday Market I enjoyed some extremely scrumptious homemade baked goods thanks to Anabel! I’m already missing her orange loaf cake which had an unapologetic burst of citrus flavour.

Evandale Sunday Market: Falls Park, Logan Road, 7212 Evandale                                              (open every Sunday from 8am to 1:30pm)

A charming restaurant with an interesting fusion menu. I seldom go to the same restaurant twice when I travel but I made an exception for this one. With great expectations when i returned for breakfast and it didn’t disappoint. Loved the rye waffles and the omelette made with slow cooked pork and kimchi!

Stillwater: 2 Bridge Rd, Launceston TAS 7250

Highly recommend Black Cow Bistro, another establishment by the Stillwater team, which serves some pretty solid steaks. My wagyu filet was melt-in-the-mouth perfection!

Black Cow Bistro: 70 George St, Launceston TAS 7250

dsc_0059

All things lavender from the jam to the scones to the cookies! Since when did I become so girly?!

Bridestowe Lavender Estate: 296 Gillespies Rd, Nabowla TAS 7260

img_1567

Sheffield- a picturesque town, in literal sense, is effectively Tasmania’s outdoor art gallery. There are more than 80 murals adorning its buildings.

Situated on the Main St of Ross, the Ross bakery Inn, is a heritage building from the early 1800’s which was once a horse-drawn carriage stop. Along side the Inn is the famous Ross Village Bakery. By all means try their vanilla slice and scallop pie, totally worth a detour!

Ross Bakery: 15 Church St, Ross TAS 720

 dsc_0206

A nice joint to stop by for a quick seafood taste before heading to the wineglass bay. Highly recommend the oyster trio as you get to eat them in various ways instead of just having them with lemon.

Freycinet Marine Farm: 1784 Coles Bay Rd, Coles Bay TAS 7215

Love everything about this modern farm! Tim and Jane and their family dogs, Billy and Sandy are super friendly. As weird as it sounds, I had the best scones in my life there… The clotted cream made by Jane gives an unique decadent consistency and a wonderful flavor.  It’s quite thick and spreadable, and when you slather it on a freshly baked scone there is no better thing in the world.

Curringa Farm: 5831 Lyell Hwy, Hamilton TAS 7140

dsc_0255

Fruit always tastes better when you pick it yourself!!

Sorell Fruit Farm: 174 Pawleena Rd, Sorell TAS 7172

imgp0248

See you soon Tassie! ❤

Whirlwind to Sydney in 36 hours

Question: What do you do when you are in Sydney?

Answer: EAT, visit some friends, go to the Sydney harbor, Bondi Beach…

Question: What do you do when you are in Sydney, and you have been there a few times before?

Answer:  EAT, you can still visit your friends, I guess…

Question: What do you do when you are in Sydney, you have been there a few times before and this time you are there for 36 hours only?

Answer: Oh, that leaves only eating!

Question: Where then can I find something good to eat in Sydney?

Answer: Go to these places!!


The first thing to draw your eyes in this patisserie is the trays of delicately constructed slices of cakes- watermelon cakes in particular. Topped with strawberries and edible flowers this dessert is just heavenly freshness! There is a generous slice of watermelon in the middle, but the layers of evenly spread almond meal help to absorb the moisture and stop the watermelon from making the whole cake soggy.

Newtown is an interesting neighbourhoods, the beating heart of Sydney’s bohemian arts scene. Do spend some time exploring the local art galleries and street art murals afterwards.

Black Star Pastry Newtown: 277 Australia St, Newtown NSW 2042

A must-go whenever I’m in town! While oyster is a popular choice for many, I had my heart stolen by the scampi sashimi long ago. Originated from NZ, the scampi is slit down the center which allows you to easily split the crustacean into halves and pull out the sweet and buttery flesh that literally melts away in one’s mouth. Absolutely divine!

Sydney Fish Market: Bank St & Pyrmont Bridge Road, Sydney NSW 2009

dsc_0438

My favorite hotcakes in the whole wide world. Period.

bills: 359 Crown St, Surry Hills NSW 2010

DSC_0859.jpg

Instead of macarons, these colorful babies are called zumbarons here. The name may be different but they taste as good- light and crisp with a gooey center, just the way they should be.

p.s. glad to see more and more zumbo stores, not just in Sydney, but across the entire Australia!

Zumbo Patisserie: 296 Darling St, Balmain NSW 2041

dsc_0456

dsc_0460

Warning: Contains Outrageously Good Doughnuts

A rapidly growing doughnut chain, Australians’ equivalent of Krispy Kreme that sells yummy, funky and not so little doughnuts!! I love the quirky little names they give to each of them. Love At First Bite is my personal favorite — a doughnut covered in cinnamon sugar and filled with half a bottle of Nutella.

Doughnut Time: 500 George St, Sydney NSW 2000

dsc_0451

A rarity: Sydney when it drizzles. The city keeps surprising me in one way or the other.