Fluffiest Overnight French Toast

As the year ends, it’s the perfect time to reflect on what you have accomplished and look ahead to your new goals.

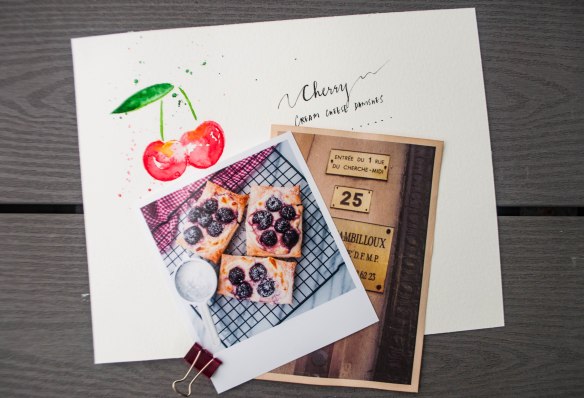
Cooking, hoarding recipes, photographing food and, of course, eating, have been my lifelong passions. Two years ago, I started the page << Miss Amateur Chef >>, this has changed my life and taken my obsession with food to a whole new level. The kitchen has always been my place of solace; working in the kitchen, testing recipes bring not only joy but beautiful memories. This little project of mine allowed me to properly document my favorite recipes- which I believe can now live on forever =)

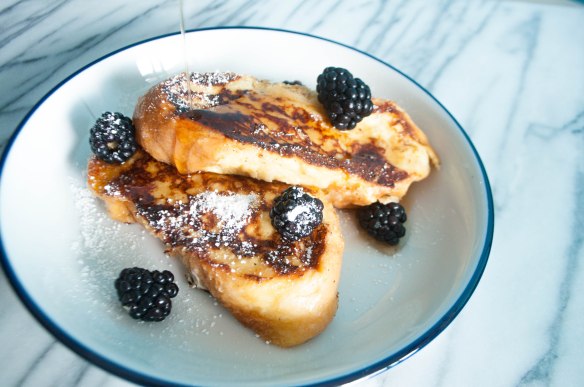
Let’s start the new year with a scrumptious breakfast! This French toast is a real crowd pleaser, it comes out best when you work with thick slices of loaf bread and allow them to soak in the mixture overnight. “Preparation is the key to success”- this applies to cooking and everything else in life. May all our preparation in 2017 make us FIERCE and UNSTOPPABLE in 2018!!!

DSC_0798


Ingredients:

Directions:

  1. Beat together egg, milk, salt, cinnamon and vanilla.
  2. Soak slices of bread in mixture overnight, until saturated.
  3. Heat a lightly oiled skillet over medium-high heat, cook bread slices on both sides until golden.
  4. Serve hot with maple syrup and berries.


Advertisement

Braised Short Rib with Sautéed Vegetables

So this is Christmas…

We all have a holiday tradition or recipe that we hold so dear and near to our hearts, don’t we? One that we keep making the same way for years and never get bored with. Boeuf bourguignon is one of such dishes for me. Hearty and so packed full of flavour. It is a must in our house in the winter months.

This Christmas I am trying to make an elevated version of beef stew based on Gordon Ramsay’s recipe with a few modifications: cutting down the amount of red wine and adding in extra tomatoes cause I like a little more acidity in the sauce. The vegetables are sautéed instead of adding to the stew at the very beginning so to avoid a soggy texture.

p.s. This is my first time working with pearl onions and they are truly god-sent!


DSC_0750DSC_0782


Ingredients:

  • Olive oil, for frying
  • 3 thick-cut meaty beef short ribs
  • Minced garlic
  • 2 tbsp tomato purée
  • 250ml bottle red wine
  • 1 cup beef stock
  • 100g pancetta lardons
  • 6-8 small chestnut mushrooms, trimmed and halved
  • 6-8 pearl onions
  • Carrots (optional)
  • Sea salt and freshly ground black pepper
  • 2 tomatoes cut in wedges

Directions:

  1. Preheat the oven to 170°C.

  2. Season the short ribs thoroughly, then panfry in the dutch oven for 10–15 minutes to brown well on all sides.

  3. Add the minced garlic, pushing it to the bottom of the pan. Add the tomato purée and heat for a minute or two to cook it out. Pour in the wine to deglaze the pan, scraping up the bits at the bottom. Put in tomato wedges.
  4. Bring everything to the boil and cook for 10–15 minutes until the liquid is reduced by half, then add stock to nearly cover the ribs. Bring to the boil again, basting the ribs with the juices.
  5. Put the dutch oven in the preheated oven for 3–4 hours, until the meat is tender and falling away from the bone.
  6. About 10 minutes before the short ribs are ready to come out, peel the pearl onions and boil them for 5 minutes.
  7. At the same time, panfry the pancetta for 2–3 minutes until crisp and golden. Add the mushrooms and carrots, cook for 4–5 minutes until tender. Drain off any excess fat.
  8. When the short ribs are ready, remove from the oven and transfer to a serving dish.  Spoon off any excess fat from the beef cooking liquid.
  9. Serve the short ribs topped with the hot pancetta and mushrooms and the sauce poured around.


Ochazuke with Seared Oysters 

Summer is almost at an end. Almost, but not quite yet. With the daytime temperature still reaching over 30 degrees, I have been craving for a dish that is light yet comforting…

That’s when Ochazuke (お茶漬け) comes in handy: a simple rice dish which combines green tea (ocha), steamed rice, and an assortment of savory ingredients (zuke means “submerged”). In Japanese homes, ochazuke is often regarded as a comfort food. It is typically enjoyed as a filler snack, any time of the day, but it is especially loved as a midnight snack (or as a hangover remedy)!

Try this really simple recipe and enjoy a hearty snack like your favorite manga character!

(You can use cold rice and cold dashi or tea in summer time to enjoy a more refreshing version of Ochazuke.)


Ingredients:

Ochazuke:

  • 1 cup cooked, steamed Japanese rice
  • 1/2 to 2/3 cup hot brewed Japanese tea (I swear by the Gyokuro stems teabag from Nakamura Tokichi Honten!) , just enough to cover the rice
  • 1/2 tbsp of soya sauce (optional)
  • Pinch of white sesame seeds (toasted)
  • Pinch of shredded seaweed

Seared Oysters:

  • 3-4 oysters
  • 1/4 cup mirin
  • 1/4 cup light brown sugar
  • 1/4 cup soy sauce

Directions:

  1. Set frying pan to medium-high heat.
  2. Pat oysters dry. Add to the pan and cook for a 1-2 minutes on each side until nicely brown.
  3. Remove oysters and reduce the heat to medium. Mix mirin, brown sugar and soy sauce, add to the pan.
  4. If sauce is nicely reduced and thickened, turn off heat. If not, continue to cook over medium heat until desired consistency is reached.
  5. Add in oysters and stir-fry for 1 minute, or until they are well-coated with the sauce.
  6. Pour the tea until it covers half of the rice and top with oysters. Add soy sauce if you like.
  7. Sprinkle sesame seeds and shredded seaweed on top for extra flavor.


Lu Rou Fan- Taiwanese Braised Pork Rice

Lu Rou Fan滷肉飯 (Taiwanese Braised Pork Rice)

Caution: The following recipe is not for the faint of heart!!

Okay, just think of it as Chinese Bolognese meat sauce! Although pork belly is the cut where bacon originates, and is known to be heavy in fat, you’ll find that the Lu Ro, despite flaunting thick layers of fat, is surprisingly not as greasy as you might have imagined. In fact, since the pork is cooked under low heat for an extended amount of time, the amount of fat is somewhat mitigated.

Braising has always been one of my favorite ways to cook meat; it is the best sort of kitchen alchemy- transforming tough cuts of meat into something completely flavorful and tender, and you know what… braised meat tastes even better the next day!


Ingredients:

  • 1 lb skin-on pork belly, cut into 1/2” pieces
  • 2 teaspoons oil
  • 1 piece of medium size rock sugar
  • a couple of shallots, finely chopped
  • 4 dried shiitake mushrooms, cut into 1/2” pieces
  • 1/4 cup rice wine
  • 1/2 cup light soy sauce
  • 1/2 cup dark soy sauce
  • 1 cups water
  • 2 hardboiled eggs, peeled (optional)

For the spices (wrap everything in the spice packet):

  • 3 star anise
  • 1 cinnamon stick
  • cumin seeds
  • 3 bay leaves
  • 2 teaspoons Sichuan peppercorns
  • 2 slices fresh ginger

Directions:

  1. Preheat oven to 160 degree C.
  2. Heat the oil in a Dutch oven over low heat, add in the sugar. Add the minced shallots when the sugar starts to melt. Turn up the heat to medium high and stir-fry the shallots for a minute.
  3. Add the mushroom pieces and chopped pork belly; stir-fry for another 2-3 minutes.
  4. Pour in the blanched pork, rice wine, light soy sauce, dark soy sauce and water. Stir and bring the mixture to a boil. Once boiling, add the spices (which should be wrapped in cloth), along with the peeled hardboiled eggs.
  5. Transfer everything to the oven and cook for around 1½ hours.
  6. Once the meat is fall-apart tender, remove the spice packet. Transfer Dutch oven to the stove, cook under medium high heat to thicken the sauce, stir occasionally, for about 5-minutes. The sauce should be thick enough to coat a spoon. Serve over steamed white rice!


Mushroom and Chicken Braided Bread

“Good things come to those who bake.”

Sometimes, all you need to do is bake, and that very act will bring you instant peace and happiness. Whether you’re baking a loaf of brioche or whipping up some quick banana bread for breakfast, the joy that fresh, warm bread brings to the table is unlike any other.

Came across this ultra easy pizza dough recipe, calling for only two ingredients- greek yogurt and self-rising flour, on allrecipes.com the other day.  Instead of ordinary pizza, I used it for a more fancy-looking braided bread and I was pleasantly surprised at how it turned out!

DSC_0333DSC_0360DSC_0385

Ingredients

Pizza Dough

  • 1 1/2 cups self-rising flour, plus more for kneading
  • 1 cup plain Greek yogurt

Filling

  • 2 Tablespoons butter
  • 2 gloves of garlic, finely chopped
  • 1/2 cup of mushroom, thinly sliced
  • 1 cup Parmesan cheese
  • 1 egg white, beaten
  • 1 bowl of chicken cubes (marinated to taste with salt and pepper)

Instructions

  1. Heat oven to 260 degree C.
  2. Mix flour and Greek yogurt together in a bowl; transfer to a work surface floured with self-rising flour. Knead dough, adding more flour as needed to keep dough from being too sticky, for 8 to 10 minutes.
  3. Melt butter over medium heat. Add garlic and cook, about 3 mins. Stir in chicken cubes and mushroom. Cook for 5 more minutes, stir occasionally. Remove from heat.
  4. Unroll pizza dough on parchment sheet. Starting at center out, roll dough into 15 x10 -inch rectangle with a rolling pin. Sprinkle cheese over center third of dough. Spoon onion-chicken mixture evenly over cheese.
  5. Make cuts 1 inch apart on both long sides of dough to within 1/2 inch of filling. Alternately cross strips diagonally over filling; turn ends under and press to seal. Brush egg white over top.
  6. Bake for 15 minutes or until crust is golden brown. Let stand 5 minutes and then cut crosswise into slices and serve!


Rosemary and Parmesan Cheese Cookie

A nice change from all the sweet cookies out there. Crumbly, cheesy, and delicious… An ideal nibble with a glass of dry white wine!


Ingredients:

  • 1¾ all-purpose flour
  • 1¼ cup finely grated Parmesan cheese
  • 1 tablespoon sugar
  • 2 teaspoon minced fresh Rosemary leaves
  • ½ teaspoon salt
  • Pinch of grated nutmeg
  • 250g butter (softened at room temperature)
  • 1 teaspoon lemon zest
  • 1 large egg yolk
  • 75ml heavy cream
  • Additional rosemary leaves and coarse salt for garnishing

Directions:

  1. Beat butter and lemon zest using an electric mixer at medium speed until smooth, about 30 seconds.  Add in the egg yolk and cream.
  2. In another bowl, combine all the dry ingredients.
  3. Gradually add the dry ingredients into the butter mixture. Cream together until well combined.
  4. Divide the dough in half.  Place each on a sheet of parchment paper, roll into a log approximately 2 inches in diameter.  Wrap logs tightly in the paper and refrigerate until completely chilled, at least two hours.
  5. Preheat oven to 160˚C.  Line baking sheet with parchment paper.
  6. Slice each log into 1/3-inch thick slices.  Space them 1 inch apart on the prepared baking sheet.
  7. Garnish each cookie with rosemary leaf and a light sprinkling of course salt.
  8. Bake for 25-30 minutes until just golden at the edges.  Allow to cool on the baking sheet for 5 minutes before transferring to a cooling rack.


Cod en Papillote with Tomatoes and Olives

The name of the dish sounds a lot more fancy than it actually is—ingredients are simply wrapped into a paper parcel and then baked.

En papillote translates to “in parchment.”  When ingredients such as fish, seafood and vegetables are sealed in a parchment paper parcel with herbs or other seasonings, it creates an aromatic, moist heat where the protein cooks in its own juice as well as the essences from other ingredients.

Ummm… So easy and so delicious!
The only thing to remember is to seal your parcel well, so that none of the delicious juices can escape!

Ingredients:

    • Parchment paper
    • 2 cod fillets
    • 2 tablespoon olive oil
    • 2 cloves garlic (thinly sliced)
    • 1/2 cup grape tomatoes, halved
    • 6 large, pitted olives
    • 1/2 teaspoon kosher salt
    • 1/4 teaspoon freshly ground black pepper
    • 4 teaspoons dry white wine
    • 2 teaspoons unsalted butter
    • 2 fresh thyme sprigs

Directions:

  1. Heat oven to 240°C
  2. Place the fish fillet on the parchment. Season with salt and pepper.
  3. In a small skillet, warm 1 tbsp oil over medium heat. Sauté sliced garlic until golden.
  4. Remove skillet from heat; stir in tomatoes and olives. Divide tomato mixture among fish.
  5. Top fillets with wine, butter and thyme sprigs.
  6. Bring the edges of the baking paper together and fold over twice to enclose. Twist and tighten both sides with string to form a sealed parcel.
  7. The parcel should look like a giant sweet. Bake for 8-10 minutes.


A woman’s love affair with doughnuts

There is no doubt that Bostonians love doughnuts. After all, there’s a Dunkin’ Donuts on every other block. The city even has a doughnut named after it (Boston Creme, anyone?). I mean, who can blame them? There’s something special about that fluffy, sugary, fried dough. I am not from Boston, but I’m in no way above the temptation of fried dough goodness. When Krispy Kreme closed all its stores in Hong Kong overnight ten years ago, a part of me was taken away…  Since then I go on a doughnut hunt whenever I’m out of town, independent joints or big chains, I visit them piously, almost like pilgrims.

These local doughnut places in Boston have survived the turf wars with Dunkin’ Donuts, many supported for years by a fiercely loyal clientele… and it’s not hard to tell why!


Union Square Donuts

20 Bow St, Somerville, MA 02143

Brown Butter Hazelnut Crunch is a real show stealer

DSC_0019.jpgDSC_0025

Kane’s Donuts

90 Oliver St, Two International Pl, Boston, MA 02110

Great selection of fancy donuts. Go for glazed and creme brûlée if you’re committed to an ultimate sweet tooth experience.

DSC_0071

Twin Donuts

501 Cambridge St, Allston, MA 02134

Highlight is definitely the inviting neon sign!

Blackbird Doughnuts

South End, 492 Tremont St, Boston, MA 02116

We all need a confetti doughnut from time to time to celebrate life!

DSC_0942-2.jpg

Red Apple Farm

100 Hanover St, The Boston Public Market, Bostom, MA 02108

An apple a day keeps the doctor away…
So, why not eat your apple in donuts form?

DSC_0032.jpg

Flour Bakery

12 Farnsworth St, Boston, MA 02210

Not really a doughnut shop, but the bakery’s renowned sticky sticky bun, especially when fresh out of the oven, mimics the flavours of  a doughnut.


Lemon Blueberry Loaf Cake

Moist, flavorful and delicious- a classic combo that everyone loves!

DSC_0868DSC_0857DSC_0900DSC_0878


Ingredients:

  • 1 and 1/2 cups self-rising flour
  • 1 teaspoon salt
  • 1/3 cup canola oil
  • 1 cup sugar
  • 2 large eggs (at room temperature)
  • 1 Teaspoon vanilla extract
  • 1 cup plain Greek yogurt, room temperature
  • lemon zest and juice from 1 lemon
  • 1 cup fresh blueberries
  • 1 Tablespoons all-purpose flour

Lemon glaze

  • 2 Tablespoons butter, melted
  • 1/2 cup powdered sugar
  • 2 Tablespoons fresh lemon juice
  • 1/2 teaspoon vanilla extract

Directions:

  1. Preheat oven to 180deg C and slightly grease a 9″x 5″ loaf pan with butter.
  2. In a medium bowl, whisk together flour and salt. Set aside.
  3. Combine the wet and dry ingredients using a spatula just until smooth. Be careful not to over-mix.
  4. Toss fresh blueberries together with one tablespoon of flour.  This flour coating will help prevent the blueberries from sinking to the bottom of your loaf while baking.
  5. Add the flour coated berries to the batter and fold gently to combine.
  6. Pour batter into prepared pan and bake for 50-60 minutes, or until a toothpick inserted in the center of the loaf comes out clean.
  7. Cool bread in the pan for about 20 minutes, then move to a wire cooling rack with a baking sheet below (to catch the glaze you’re about to add).
  8. Prepare glaze by simply whisking together the melted butter, powdered sugar, lemon juice and vanilla; then pour glaze over the loaf.  Allow to set a few minutes.


Cherry Cream Cheese Danishes

This, friends, is the moment we’ve been waiting for- spring is finally here! Beach vacation, sunshine, and sandal season are right around the corner. As the day gets longer, it’s the time to get outside and enjoy the warm weather (instead of working in the kitchen). For a quick springtime snack, light and easy is the name of the game. With this recipe, you can pull off some bakery-worthy pastries at home in just 30 minutes. Perfect for any time of the year, but I swear: they just taste better in spring!

DSC_0844.jpg


Ingredients

  • 1 sheet puff pastry (thawed)
  • 1 pack Cream Cheese (8 ounces), softened
  • 4 Tbsp Sugar
  • 1 Tbsp Vanilla extract
  • 1 cup canned Cherry Pie Filling
  • Icing sugar for garnishing

Directions

  1. Preheat oven to 200 degrees Celsius. Line a baking pan with parchment paper.
  2. Take out a sheet of puff pastry and thaw for 10min.
  3. Cut the sheet into 6 equal pieces.
  4. With a knife, score ½” border around the edge of each piece of puff pastry. Use a fork to make five or six pricks into the area within the border (this will stop the center of the dough from rising).
  5. In a bowl, mix together cream cheese, sugar, and vanilla.
  6. Spoon about 2-3 tablespoons of mixture into the middle of each piece of dough and spread around evenly.
  7. Add about 6 cherries into the middle of the cream cheese.
  8. Bake for 20 minutes. Sprinkle with icing sugar before serving.