Banana Bread

Finally lay my hands on this new member of my cookbook collection. Published by my alma mater for fund raising- this ultimate cookbook features a selection of recipes gathered by the Maryknoll Sisters through their years of missionary work over the world.

When it comes to cookbooks, everyone has a different opinion regarding the perfect one, to me, it is the total package: delicious recipes that work, beautiful photography, and most importantly, writing that inspires and intrigues. Half a century ago, when most people rarely travel far from their hometown, our Sisters had this pioneering idea of compiling a cookbook made with a vast collection of international cuisine. These recipes collected from over 40 countries, given by families oversea, were the testament of love via sharing of food. Browsing through all the strange names of dishes, from Cazuela Chilena of Chile to Kachambali of Tanzania, some of them even unpronounceable, I felt like going on a culinary journey with the Maryknoll sisters. While I may not be able to accomplish something so great like them- cooking around the globe and spreading the word of God. I enjoy cooking for my loved ones and doing all sorts of food experiment in my tiny kitchen, that what keeps me grounded.

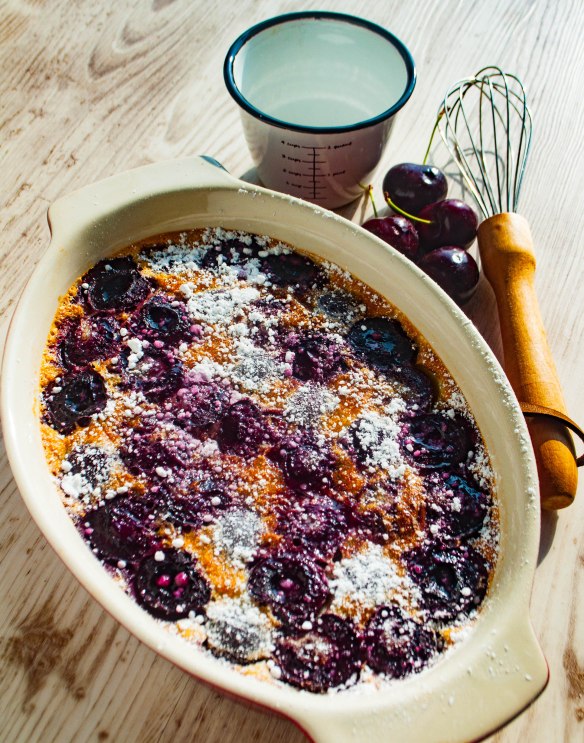
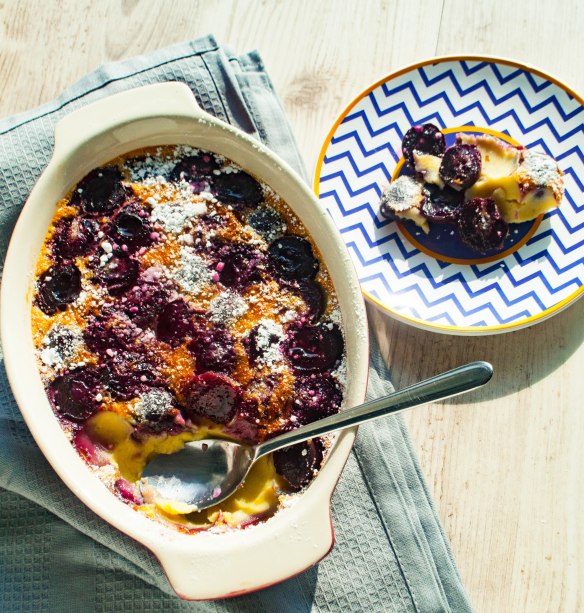
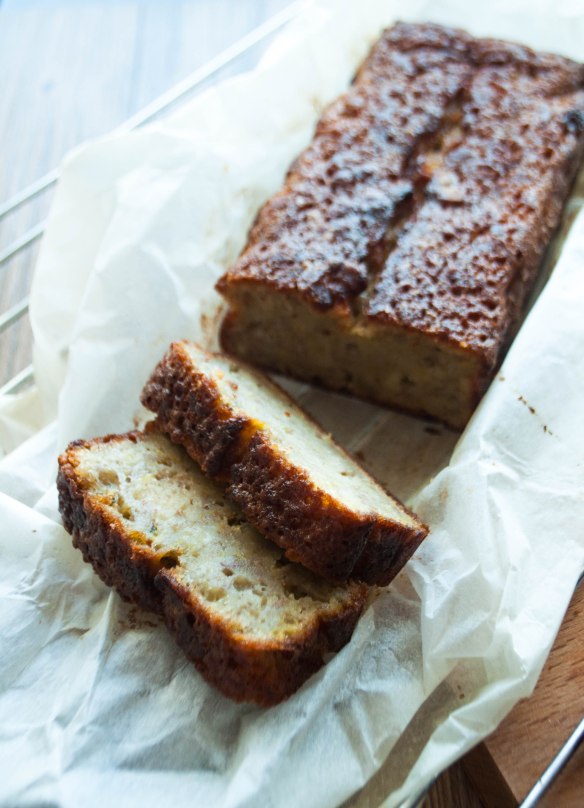
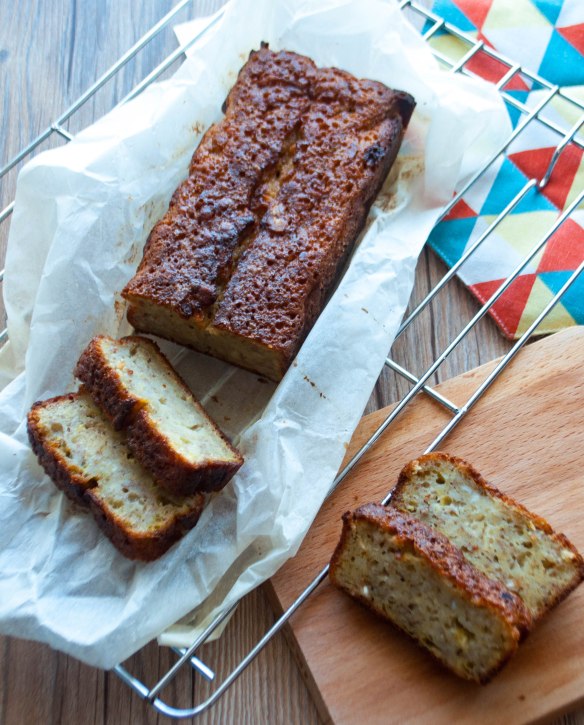
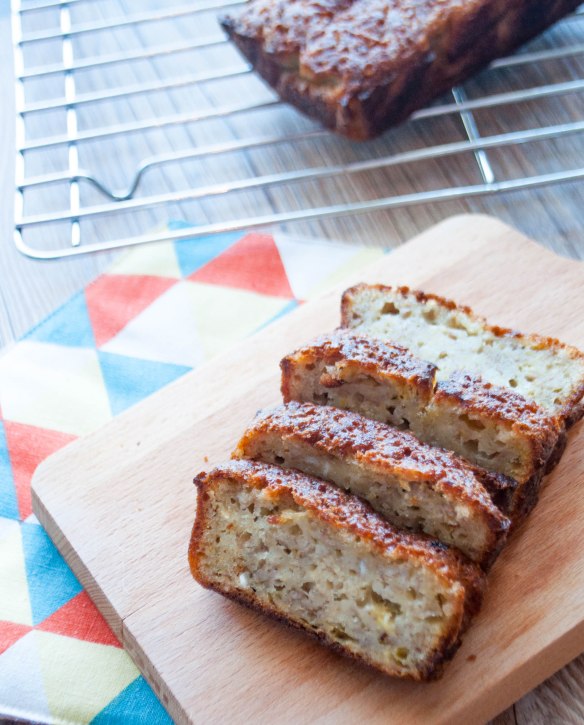
This banana bread is by far my favorite recipe from the book; it is a very basic and very forgiving recipe that takes all of 10 minutes to whisk together. An hour of waiting while your house fills with tempting aromas and then you’ll be able to enjoy your very own slide of warm, moist banana bread! Oh…I just can’t wait to try the rest of the recipes! After all the best cookbooks are the ones that gain its stains through frequent use, and later, passed down from generation to generation like a legacy.

DSC_1027

DSC_1022DSC_1033


Ingredients (for a 10x20cm loaf):

  • 230 grams flour
  • 2.5 tbsp baking powder
  • 1 tbsp baking soda
  • Pinch of salt
  • 2 overripe bananas
  • 2 eggs
  • 175 g sugar
  • 60g canola oil
  • 30g butter (melted)
  • 1 tbsp vanilla extract

Directions:
1. Preheat the oven to 175∘C and adjust the oven rack to the center. Line a 10×20 cm loaf pan with parchment paper.
2. Mix all dry ingredients in a medium bowl.
3. Mash the bananas and mix in all the wet ingredients (eggs, sugar, canola oil, melted butter and vanilla) in another bowl. Fold the mixture into the dry ingredients to form a batter.
4. Pour batter to the lined pan and bake at 175∘C. Slit the center of batter after 15min for a better rise.
5. Continue to bake for another 35 min until a toothpick inserted to the center pulls out clean.


Cherry Clafoutis

Family legend has it that I swallowed all the pits when I ate cherries for the first time… and I actually believed that when my dad told me a cherry tree would be growing on my head (in fact I was pretty excited about that!!!). Twenty some years have passed, there is no cherry tree on my head, but my fondness for the fruit continues to deepen. When cherries appear at my local market, I just have to buy them. Sweet, crisp and juicy, they often don’t even make it to my kitchen- I usually gobble them all up on my way home. But if there  are a few left, I will use them to make this dessert.

Cherry clafoutis is one of the easiest French desserts you can ever make, simply perfect for cherry season and is absolutely amazing. The batter used in clafoutis is based on a crêpe batter. Unlike traditional custard, it contains flour, giving it a dense texture. The thickened batter ensures that any juice that escapes from the cherries is well-contained. Other fruits would also work well in this dish. Try peaches, blueberries, plums or apricots!

Voilà! Un dessert facile et délicieux!

DSC_0939DSC_0952


Ingredients:

  • 2 cups of fresh sweet cherries, pitted
  • 3 eggs (at room temperature)
  • 3/4 cup of sugar
  • 1 tablespoon of brown sugar
  • 1/2 cup of all-purpose flour
  • 1/8 teaspoon of salt
  • 1 cup of whole milk
  • 1 1/2 teaspoons of vanilla extract
  • 1/8 teaspoon almond extract
  • Powdered sugar for dusting

Directions:

  1. Preheat the oven to 180 degree Celsius . Butter and lightly flour the baking dish.
  2. Scatter the cherries over the bottom of the dish.
  3. Whisk the eggs and sugars together.
  4. Add in the salt and flour.
  5. Add the milk and vanilla extract. Whisk until smooth.
  6. Pour into the baking dish over the cherries.
  7. Bake for 35-45 minutes in water bath, until lightly browned or a tester inserted into the centre comes out clean.
  8. Let cool in the oven for 10min before taking it out.
  9. When cool dust the clafoutis with powdered sugar. Serve!

Note: It will wiggle a bit when you pull it out of the oven, that is normal.

Place on a wire rack to cool. The clafoutis will have puffed up quite a bit and will deflate while cooling.


­

Salt Baked Chicken Wings with Rosemary

Salt baked chicken is one of the most classic dishes in the Hakka repertoire. The dish is both clever and flavorful. Traditionally it is made by sealing the chicken with a tight cocoon of lotus leaf or parchment paper, which is then baked in scorching coarse salt. Despite the fact that the bird is packed solidly in a thick layer of coarse salt as it cooks, it doesn’t get unbearably salty because the salt doesn’t penetrate the wrapping. The salt coat mainly serves to retain heat and cook the bird evenly.

This week I tried to remake the dish by giving it a western twist – the chicken wings were marinated with cayenne, garlic and lemon zest, before it was baked in my reliable Staub cocotte. The unique cooking method locks in all the flavors and bastes the bird in its very own essence, the chicken turned out juicy and succulent. And once the ceremonious unveiling began, herb-scented steam curled out of the parcel of goodness, filling the room with gratifying aromas. =)

­


Ingredients (serves 2):

  • 8 chicken wings (mid-joint)
  • 2 egg whites
  • 500g rock salt
  • Marinade
  • 1 tbsp garlic powder
  • 1 tbsp cayenne powder
  • 1 tbsp crushed black pepper
  • Zest from 2 lemons
  • 2 sprigs rosemary (chopped)

­

Directions:

  1. Preheat the oven to 250 deg C.
  2. Wash chicken wings, pat dry. Mix with marinade.
  3. Wrap the chicken wings with tin foil.
  4. Whisk the egg whites until foams form. Add salt and mix well.
  5. Line a French oven with tin foil. Spread a layer of salt mixture. Put in the chicken wing wrap and cover it with the remaining salt mixture.
  6. Bake the whole French oven for 30mins. Do not cover up the French oven while baking, otherwise the salt mixture cannot be dried, making the chicken very salty.
  7. Smash to remove the salt on the surface. Take out the chicken wings and serve!
  8. Soak the French oven with hot water until the salt melt before washing.

­

Baked Camembert with Rosemary & Truffle oil

Trust me when I say, there is nothing more decadent than this rich, fragrant, creamy wooden box of gooey goodness. In this recipe, my favorite cheese is baked to a pouring consistency and is then served with crusty bread. It is the perfect way to end a long day at work or brace yourself for an afternoon of shopping in the cold. If…that is, it ever gets cold in Hong Kong!

baked camembert


Ingredients:

  • Camembert, in a box
  • 1/2 garlic clove, thinly sliced
  • Few rosemary sprigs
  • 2 tsp white wine
  • 1 tsp honey
  • Drizzle of truffle oil
  • Pinch of freshly grind black pepper

Directions:

  1. Remove the cheese from the fridge 1 hour before cooking, so that it can come to room temperature.
    (otherwise it will take forever to cook)
  2. Preheat the oven to 200C.
  3. Remove any plastic packaging from the cheese and place back in its box, leaving the lid off.
  4. Poke the garlic and rosemary into the holes, pour over the wine and honey, then grind over some black pepper.
  5. Bake for 15-20 minutes, or until the centre of the cheese is melted.
  6. Remove from the oven and leave the Camembert to cool a little before drizzling with the truffle oil.
  7. Serve the bread with the warm cheese for dipping.


Chocolate Chip Cupcakes with Peanut Butter Frosting

Happy New Year everyone!! How has 2015 treated you? The start of a new year is always exciting, it is the perfect opportunity to wipe away everything from your slate and start clean. This year, instead of setting up long list of resolutions to be met, I have only one task in mind – be true to myself. Yes, we hear this phrase over and over again; it’s so overused that sometimes it loses its meaning. But admit it, there are times we do certain things, act or dress in certain ways, just because we want to be accepted. Ask yourself, are you staying with your boring job just because it makes a lot of money? Do you go to that party because everyone else does? Are you stuck in this stagnant relationship because you are afraid to be alone? Remember, there are too many wonderful things in this world that you could be doing instead- things that make you happy, things that make you come alive.

Be a beautiful cupcake in a world full of muffins!!

( Or be a fruitloop in a world full of cheerios for a healthier version =P )

cupcake grid

cupcake 1.jpg

cupcake 2.jpg


Ingredients (yields 10 cupcakes):

Frosting

  • 1 cup creamy peanut butter
  • 1/2 cup butter, softened
  • 2 cups confectioners’ sugar
  • Milk as needed

Muffins

  • 2 cups all-purpose flour
  • 1/2 cup white sugar
  • 3 teaspoons baking powder
  • 1/2 teaspoon salt
  • 3/4 cup milk
  • 1/3 cup vegetable oil
  • 1 egg
  • 3/4 cup mini semi-sweet chocolate chips
  • 3 tablespoons white sugar
  • 2 tablespoons brown sugar

Directions:

Frosting

  1. Place the butter and peanut butter into a medium bowl, and beat with an electric mixer.
  2. Gradually mix in the sugar, and add in milk one tablespoon at a time when it starts to get thick.
  3. Beat for at least 3 minutes until the frosting is fluffy and thick.

Muffins

  1. Preheat oven to 200 degrees C.
  2. Line muffin cups with baking cups.
  3. In a mixing bowl, combine flour, 1/2 cup sugar, baking powder, chocolate chips, and salt; mix well.
  4. In a large mixing bowl, combine milk, oil and egg, blend well. Add dry ingredients all at once; stir just until dry ingredients are moistened.
  5. Fill baking cups 2/3 full.
  6. Bake for 20 to 25 minutes or until toothpick inserted in center comes out clean.
  7. Cool completely before piping the frosting.

­

Thai Red Curry with Duck and Lychees

You know you are a foodie when…
You try to hit every restaurant when it opens, and you have an opinion about all of them. You spend the lion’s share of your hard-earned salary dining out, drinking wine, and shopping at City super. You look up for good restaurants on the fork/ urbanspoon /opentable and mark your mealtime on the itinerary before you travel to a new city. You know what’s important in life, and it is all about saving your food quota for excellent things…

I guess foodie genes run in the family, I was born in a family that appreciates, or, more precisely- celebrates good food. Despite everyone’s busy schedule, we try hard to gather round dinner table to share a meal (and complain about work) at least every week. I have always believed in the power of food to magically create intimacy, conviviality and community. Weekly dinner with my parents is still a ritual that I hold dear and near to my heart after I got married and moved out. Returning home for familiar dishes that I enjoyed as a kid makes me feel connected to the family. Just like any master home cook, my mother rarely uses recipe. Very different from my obsessive, strictly regimented method of cooking, she cooks everything from memory. In my mother’s kitchen, there are no scales, no measurements, yet no mistakes.

She’s never really taught me how to make her signature curry, but here’s my version.

curry duck 1 curry duck 2


Ingredients:

  • 2 duck legs
  • 2 tbsp light brown sugar
  • 6 tbsp red Thai curry paste
  • 1/2 can coconut milk
  • 2 tbsp fish sauce
  • 50ml of water + 100ml of chicken stock
  • 4 lime leaves
  • 6 cherry tomatoes halved
  • half can of lychees

Directions:
1. Preheat oven to 180C.
2. Pierce the duck’s skin all over with a toothpick. (This step allows a well-crisped skin!)
3. Pan-fry the duck legs in an ovenproof pan on low heat for 10-15 mins, turning once, until coloured all over.
4. Remove duck leg from the pan. Add the sugar to the duck fat in the pan and cook until caramelised, then add the curry paste and cook for few mins until fragrant.
5. Stir in the coconut milk, chicken stock and water. Simmer until everything is combined
6. Add the fish sauce, tomatoes and lime leaves.
7. Slip in the duck legs, cover the pan and cook in the oven for 1½ hrs until the duck is tender.
8. Cooked uncovered in the oven for an extra 30mins.
9. Place the pan back on the heat, add the lychee and simmer for 2 mins.


Linguini with Clams and Garlic Butter Sauce

Sigh! Looks like we are having a rainy (Halloween) weekend =(
With the bad weather dampening the spirits, I’m in the mood for a flavorful dinner.

This is the perfect recipe for one of those lazy days, you don’t have to think about it and it still guarantees a great dish.
You simply have to mix garlic butter, white wine and clams together and pour everything over the pasta. The linguini will soak up the clam broth and flavor, this light sauce also compliments angel hair.

Well I guess gloomy weather doesn’t always have to be depressing or mind numbing. Sometimes I just can’t find anything more soothing than a good movie night, with the rain splashing down on my windows, lights low, candles lit, dinner ready and a rom-com movie just about to begin…


clams with garlic butter 1 clams with garlic butter

Ingredients (serving for 2):

  • 0.5 lb dried linguine
  • 24 littleneck clams
  • 4 tbs crushed garlic
  • 4tbs white wine
  • Pinch of parsley leaves and red pepper flakes for garnish

For garlic butter (4tbs)

  • 1 cup butter, softened
  • 1 tablespoon minced garlic
  • 1/4 cup grated Parmesan cheese
  • 1 tablespoon garlic salt
  • 1 teaspoon Italian seasoning
  • 1/2 teaspoon ground black pepper
  • 1/2 teaspoon ground paprika

Directions:
Garlic butter
1. In a small bowl, combine softened butter, minced garlic and parmesan cheese.
2. Season with garlic salt, Italian seasoning, pepper and paprika. Mix until smooth.

Pasta
1. Cook pasta in boiling water until al dente.
2. Steam 24 littleneck clams and set aside.
3. In a small saucepan, melt garlic butter over medium-low heat.
4. Add crushed garlic and then wine.
5. When butter starts to bubble, add clams and mix around until clams are well coated.
6. Place pasta in a serving bowl, and top with the clam mixture.
7. Garnish with Parmesan, parsley and crushed red pepper flakes.